Tuesday, May 31, 2011

The first one was just practice

I've started the black and gold beaded sash again, this time with enough beads to finish- I hope.

This time I'm using all the same size bead.

I managed to finish about 7 inches of this strand while watching a movie with my son who had a day off from school. And then, when I got up to take the dvd out of the player, there was a horrible noise. A noise I hate more than any other.

It was the noise of beads flying across the countryside.

I'm not sure what he was thinking. I don't know if he saw the bead tray and made a conscience decision to sit on it, or if he wasn't paying any attention at all and just plopped himself down. All I know is that it took 2 hours! Two whole hours to sort out the mess of tiny black and gold seed beads throughout my couch! My couch that has black and gold running through it so those beads blend it really well.

I'm sure there's still a pile of them somewhere in the recesses of couch cushions and throw pillows. But my eyes went cross eyed in the search. While my son asked for a snack, a drink, is it time to go to the gym yet? I'm cold. I'm hot. Aren't you done yet? You said you'd watch the movie with me! What are you doing? Can I have milk? Tell the cat to stop staring at me! My toe hurts. What are you doing? How long is that going to take? What's for dinner? What are we going to have for dessert? Do we have cookies? Can I stay home from school tomorrow? Why is the dog barking? Can I play on the computer? Why not? When's dad coming home? How long until my birthday? What time is it?

Who knew motherhood was so glamorous?

Happy crafting!

Monday, May 30, 2011

Whirlwind

Wow! I'm still trying to catch my breath from this past weekend. Busy busy busy!

And it just keeps going! My son is having a day off from school today, so I'm left to entertain him. Unfortunately, there's about a million errands that we have to get through. So, I'm going to take a deep breath, put my head down, and get the errands done as quickly as possible. I see a lot of bribing in my near future!

As you might have guessed, not a lot of progress was made over the past few days craft wise. It was, however, very valuable planning time!

Each month, Steve and I have a date night. One night, out of the house, no kids, where we actually get to be a couple. For the last few months, our monthly date night has been going to the Cabaret performance in Wellington. An awesome show! June, however, will be ever so slightly different.

One of the things that draws us together is a mutual love for a little classic movie called The Rocky Horror Picture Show. And in June, the Embassy Theatre in Wellington is showing it again!

If you've never been to a RHPS theatre performance, you should. People get dressed up- the more extravagant the better- and really get into the character of the evening. For about 3 hours (with all the pomp and circumstance) a group of strangers come together to share a beautiful, open minded experience. When you begin to feel like we're all alone and modern society has effectively isolated each individual, an experience like a RHPS showing makes you realize just how connected we all are.

What's this got to do with crafting? Well, I ordered Steve's costume, because it's a bit beyond my sewing skills. I'm beginning to practice the makeup for him. And I've got the design for my costume in my head. One of my errands that needs to be done soon is to get some material to make said outfit.

I won't need much!

Oh Rocky!

Happy crafting!

Saturday, May 28, 2011

Flutterby

Well, the bad news is, the craft store didn't have the beads I needed to finish Santa's sash.

The good news is, look at the pretty bracelet!

I still have plan B, but plan B has been demoted to plan B.2, possibly plan C. I have a new plan B.


In the meantime, though, today is the last Friday of the month which means it's Cabaret night! Woo Hoo!

Of course, this also means that I really should finalize my outfit for the occasion. Lucky me, the other good news is that I found a few extra little treasures at the craft store.

 I've decided I want a decoration for my hair.

This black rose pin will serve as a good basis. Now, sometimes a pin will work quite well for a hair decoration. If you use a hair band to tie your hair up, you can attach a pin to the band.

I have short hair, however, so that's not really an option for me now.
 So, first task is to remove the pin back. It's a bit frightening how a commercial pin can be so easy to dismantle!
 These little hair clips are invaluable! They're also a bit tricky to find. Although I have seen them in wig supply shops. Apparently they're quite good for securing wigs.

I have yet to try that.
 I used straight pins to hold one side of the clip in place while I sewed the other side down.

Important note! Before beginning to sew, make sure your clip is facing the right way!
 When I sewed the clip on, I cam up through the bottom petals as close to the center of the flower as possible.

It's a bit hard to see, but that's kind of the point. If it were apparent, it wouldn't look good.
 This is the clip sewn on.

You can secure the threads with a small amount of glue or clear nail polish. It just helps ensure that the knots won't come undone.
 I'm a tiny bit obsessed with butterflies at the moment. This happens about every other year or so.

I'm always addicted to glitter, though!

To attach the butterfly, I took one stitch into the petals and tied the bug on. It's not like it's under a lot of stress, so I'm pretty confident with one string holding it in place.
Ta-da!

It's a grand topper for a grand evening!


Happy crafting!

Friday, May 27, 2011

Yes, Virginia

I hit a bit of a stride today.

 I finished sewing on all the fur trim.
 Thank goodness.

It looks lovely, and it's not actually hard to attach, but I do get tired of having short black hairs in my mouth.

Get your mind out of the gutter. This is Santa! A childhood icon! A symbol of all that is innocent and good in the world!


Besides, he has white hair.

 Anyway, I put his jacket on.
 Secured it with a couple of stitches so that it doesn't move around too much.


That look is one that says: GIVE ME HAIR!

Santa will have to wait a little longer for that. First I want to get some of the details on his coat finished.

Starting with the dreaded sash


 When I got the silver cord cop out alternative sash, I also picked up a gold one. You know, just in case.

I'm still saving this for plan B.
 Those of you paying attention may recognize the beginnings of my favorite beading stitch. I'm using black seed beads for the inside, and 2 sizes of gold beads for the outside.
 Progress shot.
 Remember to go through the last 3 beads plus the one just added.


This is going to make a stunning belt!


If I can find more beads.

Yeah, I ran out of the large gold beads. The bad news is: this is only big enough to go around 1/2 of Santa. The good news is: if I can't find more beads I still have plan B ready to go, this is the perfect size for a bracelet, and I have a coupon for the craft shop.

Three good to one....not so good. And tonight is Burlesque. And there's chocolate in the house. And.... I think, despite the rain, the cold, and the cramp in my chest, today is going to be a good day!

Happy crafting!

Thursday, May 26, 2011

On Sick Days

When you become a parent and/or work for yourself, sick days quickly become a distant memory occasionally recalled through snotty tissues and coughing fits. Unfortunately, becoming a parent and/or working for yourself doesn't stop germs from attacking you, it just makes it a lot harder to fight back.

Now, I know what you're thinking: when I stay home sick from work/school, it's a chance to catch up on my crafting since it's so relaxing. Yeah, ok. Tell me that next time you think your head may explode from the pressure building up inside of it.

To make matters worse, the craft gods are still upset with me over something I did, but have no recollection of.

As a result of the standing disagreement with the craft gods and the cold that has decided to make anything other than sleeping a chore, this is what I got finished today:
 What? You don't see it?

 Here, a closer look.

 I finished a boot. It may not seem like much, but let me explain this part to you. When I put the boot on Santa's foot, I had to adjust the pant leg. As I was straightening the pant leg, making it neat and tidy, the gathering thread at the waist snapped! Making the pants fall off Santa.

 You'll never think of Christmas Eve the same way ever again.


So I fixed the waistband, this time with a thicker cord.

And then sat staring out the window deciding if I had the energy to go to belly dance class.

Then the boys started arguing about something on the x-box, and I decided I didn't have the energy NOT to go to class!


Happy crafting!

Wednesday, May 25, 2011

What we have here is a serious lack of motivation

I don't know. Maybe it's because it's May and despite the wintry conditions outside my mind is rebelling at the thought of Christmas so early in the year. Possibly there's just something about these Santas that's putting me off. They've been hanging around the studio half finished for a year and a half, after all, and have rested at one time or another on just about every surface in here! I'm really struggling with this.

I did manage to force myself to sew on some of the fur trim. I still have the sleeves and boots to do (which is silly since they're both the smallest areas, but I just couldn't do it).

 Anyway, the underside of the fur material looks like this.
 Fold it in half lengthwise so that the furry side faces out.


This could make really funky tassels for belly dancing. There's something to try!
 Focus!

Hold the edges of the fur trim in line with the edge of the material. You want the trim to be laying against the material so that when you flip it forward it will hide the seam. 
 Hand stitch the edges together.
Add fur trim to the bottom of the jacket, the sleeves, the hood, and down one side of the front. It doesn't matter which side, whatever tickles you.

Or, do like me and procrastinate by playing on Face Book, or browsing videos on You Tube. There's a video I found on there a few months ago that was seriously awesome, but I can't locate it again. Bummer.


Happy face booking crafting!

Tuesday, May 24, 2011

Santa's Sash

Today I'm determined to finish a Santa. Since the white robed Santa is nearly completed, I'll focus on him. And what he needs right now is a sash. Because what's Santa without a sash?

 The silver cord I have is a bit thin to just tie around his middle, so I'm going to do something AWESOME!

I have this great book that shows step by step how to tie Chinese knots. They're really beautiful.

When done right.

I'm using my padded clip board to give me an anchor and straight pins to hold the cord in place.

So far so good.

This is the Pan Chang knot. One of the basics from the start of the book.
 Starting to look a bit more complicated.
 Wow. Spaghetti junction. But that's what the picture in the book looks like. So I guess I'm ready to tighten.


 Not horrible. Not quite right either, though.

Hmmm.....what else can I do?

Going back a page in the book, I come to the Button Knot. Very simple. And you can make a flat version and string them along to make a very pretty necklace. Or sash for Santa!

Bingo!
 Step one: easy peasy.
 Step two: still lookin' good.
 Step three: I could do this in my sleep.
 Step four: Ummm....

Well, it's like the picture in the book, so I'll tighten.
 What the !?!?!

That's NOTHING like the picture.
 Compare mine with the picture.

Ok, just need a bit more practice.

But first, I need to pick my son up from school.
 And look what followed us home!

A "sash" worthy of any Santa.
 Of course, I found out that when you trim it, it unravels into a riot! And since the middle is cotton, it just catches on fire if you try to seal the end.

No worries. My darling husband hand a brilliant idea.

First, tie a bit of string a little ways down.
 Cut off the end being held together with a bit of tape so that the rope goes WHA!!

Trim the cotton innards close to the string.
 With another bit of thread, start with one end laying along the cord away from the fringe. Make a loop in the direction of the fringe, then start wrapping the long piece of the thread around the cord tightly wrapping towards the fringe.

When you've got about a centimeter wrapped, put the end of the thread through the loop. Now pull gently on the first end. The loop will pull into the middle of the wrapped section, taking the thread with it. There should be a slight "click". That's your cue to stop pulling, and cut the ends of the thread off. It's now secure.

I attached a couple of silver bells to the ends of the rope to help hold the tassely bits together.

Another silver bell got sewn onto the end of his hood....but I don't think I actually got a picture of that yet.
 I found these great buttons a while back that I thought would be perfect for a Santa.
 That white spot on his cheek isn't apparent in person. I didn't actually notice it until I saw this picture. Hmmm....

Anyway, I glued his hood to his head to keep it in place.
And there he is. I think I'll call him Nick.

But....

Yeah, he's not done yet. I  don't feel good about selling him like this. He needs a bit more detail. So I think I'll leave him for a bit to inspire me a little more before I put him up for sale.

Besides, I still have the black and gold Santa to do!


Happy crafting!

Monday, May 23, 2011

Christmas Year 'Round

Late May. The temperature is plummeting, the frost on the grass and rooftops in the mornings is a hint of the snow that will shortly be falling on the surrounding hills, the shorts and bikinis are put away to make room for sweaters and long johns (keep the tank tops handy, though, they're good for layering), the days are getting shorter, the nights longer, and families are driving each other crazy with cabin fever. Soon, friends and family will get together over mid-winter Christmas feasts and celebrations. An attempt to drive the cold darkness away. Winter approaches.

Being from the Northern Hemisphere I never truly appreciated the relationships between holidays and the seasons until I came here and they're all backwards! Easter in Fall. Halloween in Spring. Christmas in Summer. And not a darn thing but cold, dark, snow, and endless rain in Winter. Northern Hemisphere people, count your blessings.


 But regardless what hemisphere you reside in, May/June/July are actually great months to work on Christmas projects.

Actually, I started these 3 Santas about a year and a half ago.

Which is probably why I've misplaced his legs.

And the pattern. Yes, I used a pattern for this, altered a bit, but I'm not going to say who did the pattern until I can find it and make sure I give credit to the right person.

You may notice the head on that one looks a bit small. Like I said, I altered the pattern a bit.

Because I enjoy sculpting faces.

I used Super Sculpy (wonderful stuff!) to sculpt these, and the eyes are plastic doll's eyes.
 I've already added facial hair to this one. You can see how much the hair fills in. It's why I've left the faces fairly rough.
 Now, I've already made (mostly) the pants and coats for these guys, but I still need boots and gloves. Of course, without the pattern, I sort of have to make it up. Actually, the pattern doesn't include gloves- that was one of my alterations, so I'd be making those up regardless.

I use interfacing material for my patterns. It's perfect! And much better than those stupid tissue patterns. Ick.


 Anyway, I just traced a foot and a hand onto the interfacing with a pen.
 Then added about 1/4 inch to the lines. That will mark the sew lines for the pattern pieces.

I probably should have ironed the interfacing first, but I REALLY hate ironing!
 Hmmm....that's a bit hard to see.

Whatever. Fold your material in half, right sides together, and pin the pieces on leaving at least a 1/2 gap between them. You'll need 2 of each piece (double thickness).

Unless you intend to make a Santa with only one arm and/or leg.

Come to think of it, a pirate Santa with a peg leg and a hook would look pretty cool.

Trace your pieces out on the material with a bit of chalk. 

Geez! That's hard to see.

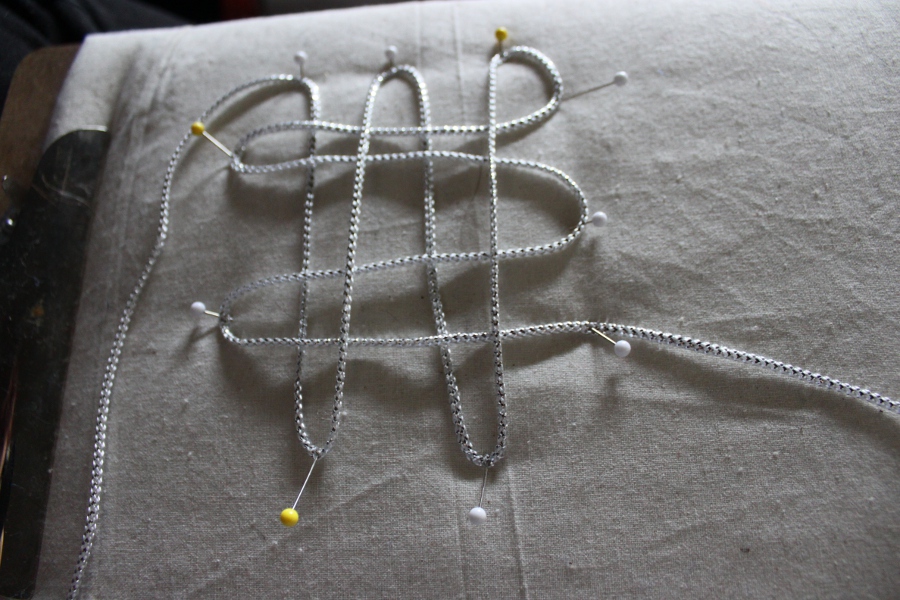
How about the silver material?
 Much better.
 And sew directly on the chalk lines.
 Cut out the pieces with a 1/4 inch seam allowance. Clip the curves...
 ... and turn right side out.
 Slip the gloves onto the arms of the Santa. Fold the raw edges under and sew onto the arm.

The sleeves of the coat will cover the tops of the gloves.
 For the boots, first gather the ends of the pants. The boots will go on over the top, the gathering stitch just makes that a little easier.
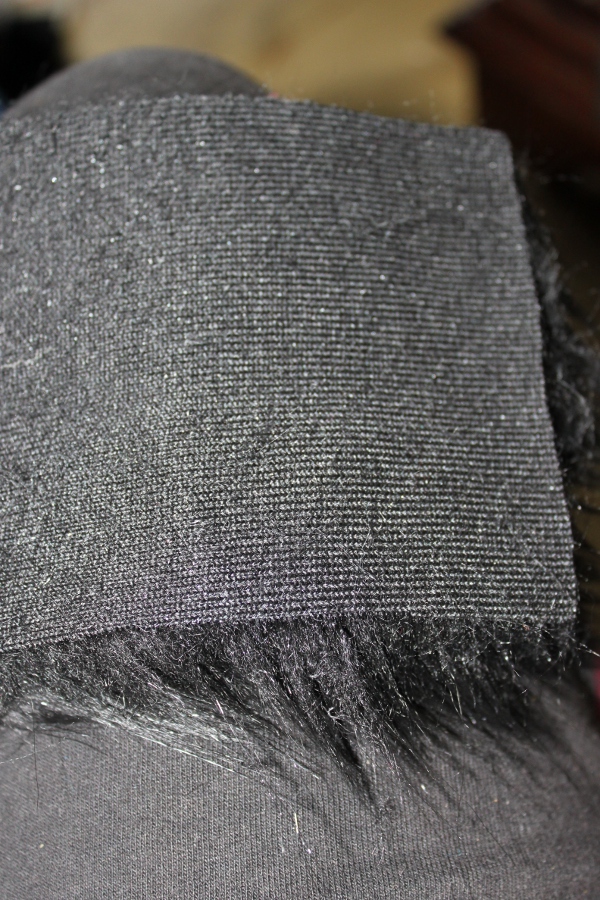
 Cut a piece of the fur trim long enough to go around the top of the boot once.
 Then cut the trim in half lengthwise. You now have one piece of trim for both boots.
 Fold the raw edges of the boots down, and sew on the fur trim.
 When you've gone all the way around the rim of the boot, put it on your Santa, and adjust the pants to straighten and even out the gather. Then, sew the raw edges of the fur trim tightly together. Catching the material underneath will help hold the boot in place, too.

If you want, you can also add a few dabs of glue. Keep in mind, though, that the glue will be between the boot and the pants, not the leg itself.
 Slip the coat on your Santa. On the edge without fur trim (I'll go into this in more detail in posts to come), take a small stitch at the neckline, and another at the waistline to hold it in place.
 Then, bring the other side over, and take a small stitch at the neckline.

Santa is now ready for the finishing touches.

The first bit of which will be a sash. That doesn't yet exist. And it's time for dinner. So Santa will stay in this mostly finished state for a little longer.
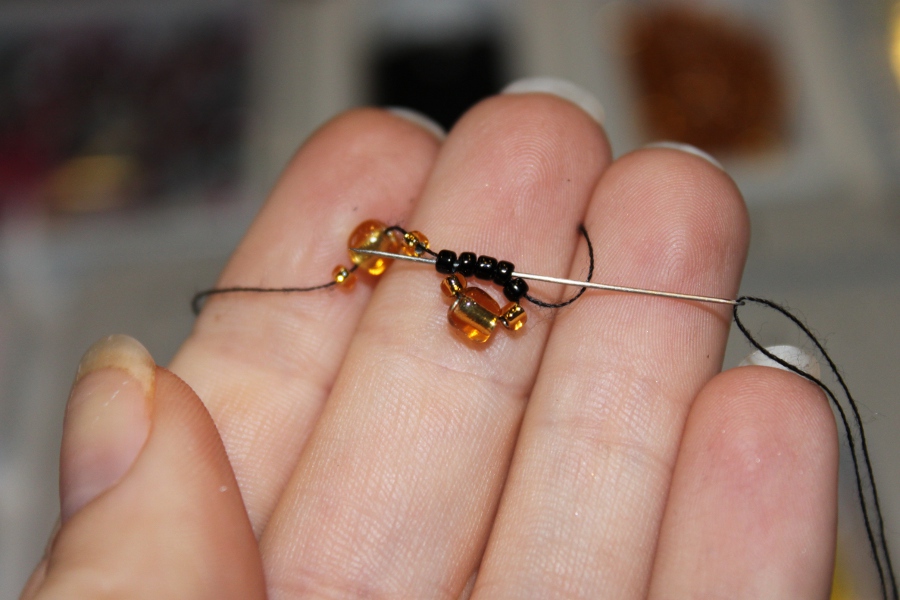
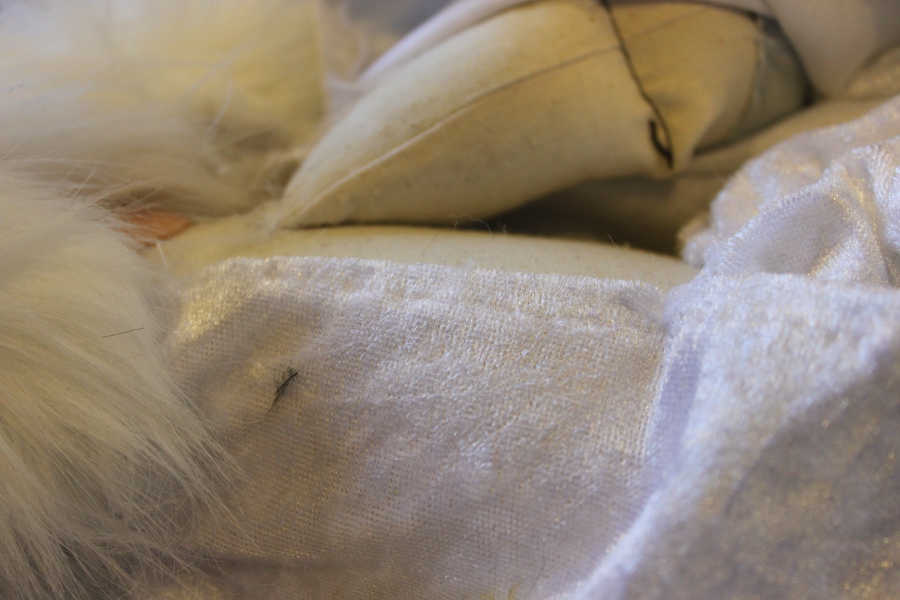
 After dinner, I decided I really wasn't in the mood to make a sash yet, so I started to sew the fur trim on the black and gold costume.

I had, at one point, sewn a feather boa to the edges of this one, but decided rather abruptly that I didn't like that look. So I cut it all off.
And got this. It may look like a cat, or possibly a Tribble, but it's actually black fur (fake of course) trim.


To be continued....