
I have this great book that shows step by step how to tie Chinese knots. They're really beautiful.
When done right.
I'm using my padded clip board to give me an anchor and straight pins to hold the cord in place.
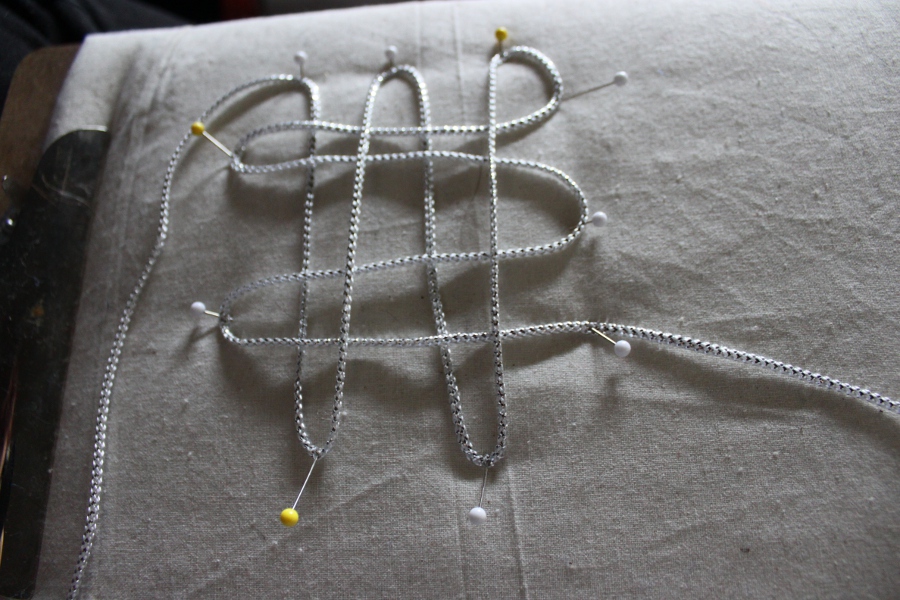
So far so good.
This is the Pan Chang knot. One of the basics from the start of the book.


Hmmm.....what else can I do?
Going back a page in the book, I come to the Button Knot. Very simple. And you can make a flat version and string them along to make a very pretty necklace. Or sash for Santa!
Bingo!


Well, it's like the picture in the book, so I'll tighten.

That's NOTHING like the picture.

Ok, just need a bit more practice.
But first, I need to pick my son up from school.

A "sash" worthy of any Santa.

No worries. My darling husband hand a brilliant idea.
First, tie a bit of string a little ways down.

Trim the cotton innards close to the string.

When you've got about a centimeter wrapped, put the end of the thread through the loop. Now pull gently on the first end. The loop will pull into the middle of the wrapped section, taking the thread with it. There should be a slight "click". That's your cue to stop pulling, and cut the ends of the thread off. It's now secure.

I attached a couple of silver bells to the ends of the rope to help hold the tassely bits together.
Another silver bell got sewn onto the end of his hood....but I don't think I actually got a picture of that yet.

Anyway, I glued his hood to his head to keep it in place.

But....
Yeah, he's not done yet. I don't feel good about selling him like this. He needs a bit more detail. So I think I'll leave him for a bit to inspire me a little more before I put him up for sale.
Besides, I still have the black and gold Santa to do!
Happy crafting!
No comments:
Post a Comment