Especially since it looks like I need a new pair of warm boots.

<sigh> They're not even very old! Growing up in San Diego, where you can wear flip flops (jandals for my New Zealand audience), I never really understood the joy of ugg boots. But here in windy Wellington, it's not so much a fashion statement as a defense against frost bitten toes!
But of course, that's not really related to crafts, except of course it's hard to be creative when you can't feel your feet.
Moving on.
I wanted to try a little experiment with my bead loom. So, I created a beaded amulet bag on the loom.
It's for my own personal use, which is really good since I'm really not satisfied with the result. Note to self, beaded bags don't really work on the loom. But I'm getting ahead of myself. Let me start at the beginning...
 I promise not to start singing numbers from the Sound of Music. Although who doesn't love singing and dancing Nazis?
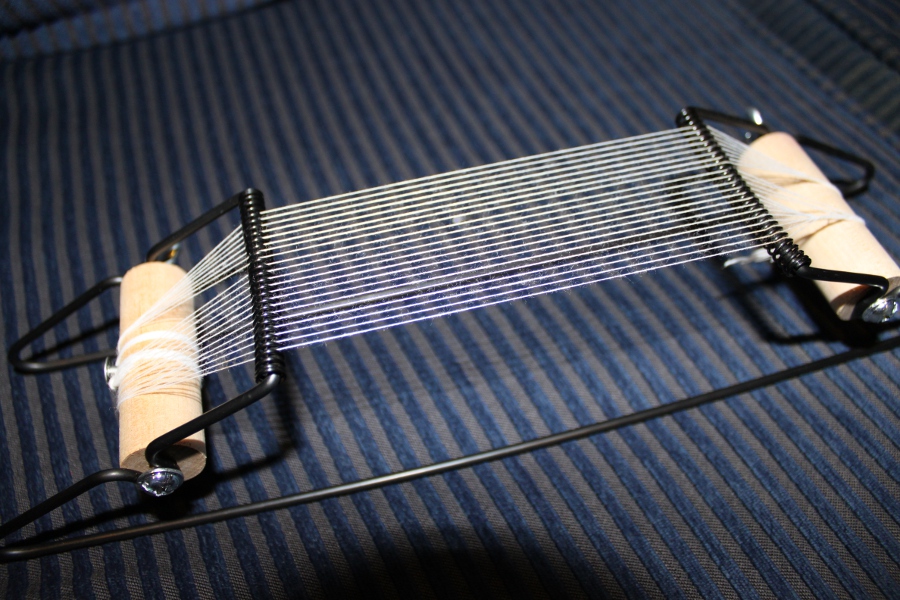
21 threads! Count 'em. The loom can actually hold a bit more, but not much.
I drew out a design on graph paper. Fairly simple, it's sort of Steve and my "logo". We have it tattooed on our wedding ring fingers, and we repeat it in a lot of what we do.

But for bag purposes that's where I stop liking it.
On the loom, of course, the beads are worked in a band. In order to make a tube for a bag, you have to sew up one side.
You may notice the white "sutures" along the right side. Yeah. Don't really care for that. It would be possible to hide those by threading each thread (that's 42 since it's on both sides of the band) back through the bead work. But quite honestly I need some needles with a bigger eye before I attempt that extravaganza.

So I'll live with it like this.
And move on to the next bad call.

 Whatever. It's good enough for the moment. I think I might use this as a reminder for myself of good ideas gone wrong.
 At least my ipod fits in it, so even though it's somewhat less than perfect, it's still functional.
 Continuing with the checkered design, I'm using square stitch to form a band.
The thread goes through each bead 5-6 times, making this a very strong stitch, ideal for bracelets and bag bands.
The first row is simply a string of beads as wide as you want. Then, thread a bead on, run your needle back through the first bead on the previous row.
 Then through the bead just added.
Continue for each bead in the row.

At the end of the row, take your thread through the previous row.


It takes a lot of thread.
I was working on this last night while watching Tron, when Asha (the cat) decided she was cold and lonely, and needed a snuggle. Thank goodness she waited for me to put the beading tray down before pressing the issue and spending the rest of the evening acting as a lap warmer.
So this still needs the rest of the band, plus a bottom (hence the title of the post). Which I'm hoping to complete today.
In between orange juices and borage teas.
No comments:
Post a Comment